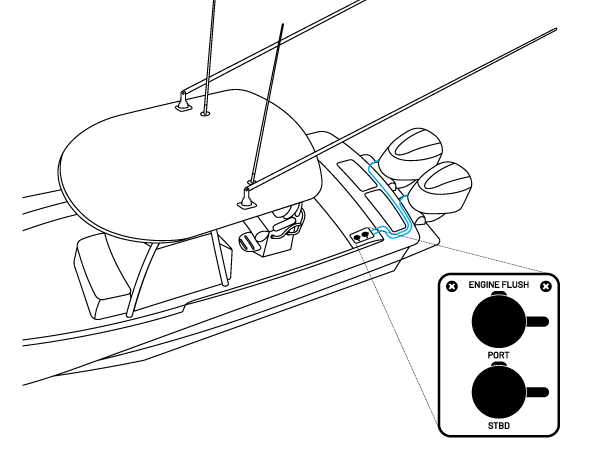

Boat diagram showing two separate engine flush lines routed to a Dual Reroute plate

THE HOSE BEHIND YOUR REROUTE

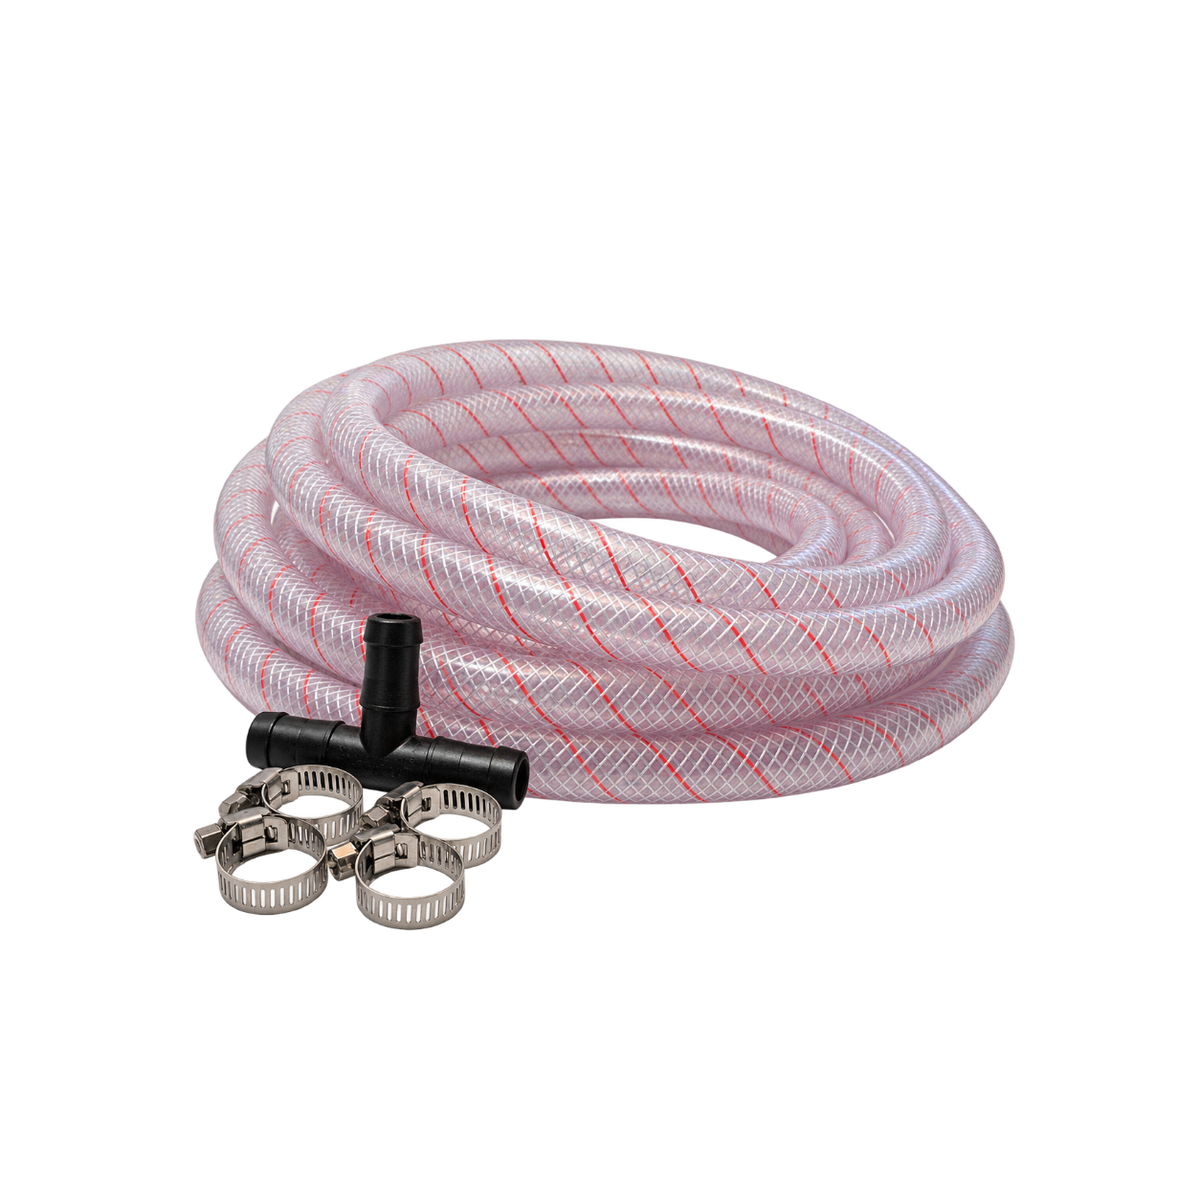
The Flush Port Reroute moves your flushing connections to a plate inside the boat. This Reroute Install Kit supplies the hose, tee fitting, and clamps for the connection from one engine to that plate.

A separate hose runs from each engine’s flush line to its own outlet on the plate. The blue lines in this two-engine diagram show the general route.

The plate and its Quick Connect fittings are sold separately. A Flushmaster Controller is optional for automated flushing; it is not included.

Diagram is a layout overview only. Actual routing and connection points vary.

Read the Installation Guide

WHAT’S INCLUDED & SPECS

WHAT’S INCLUDED
  • (1) 25 ft length of reinforced hose in your selected size: 1/2″ or 3/8″
  • (4) hose clamps
  • (1) matching tee fitting

Flush Port Reroute plate, Quick Connect adapters, controller, controller outlet hoses, mounting screws, and tools are sold separately or supplied by the installer.

SPECIFICATIONS
  • 1/2″ hose option — SKU: SM-FMRIK12
  • 3/8″ hose option — SKU: SM-FMRIK38
  • Hose length: 25 ft per kit
  • Hose construction: Reinforced
  • Included hardware: 4 hose clamps and 1 tee fitting matching the selected hose size
  • Quantity planning: 1 Reroute Install Kit per engine; verify the required hose route before purchase.
SIZE & COMPATIBILITY

Choose 1/2″ or 3/8″ to match your confirmed installation. Match the hose, Reroute barb, and engine connection; do not choose by engine brand alone.

Have a qualified marine technician confirm the correct flush line, any check valve or factory reroute provision, and whether the supplied tee is appropriate. Fitment is not universal.

Measure the actual route, allowing slack for steering and tilt. Confirm that 25 ft is sufficient for each engine before ordering.

INSTALLATION & SAFETY

This is a general overview only. Installation varies by engine brand, model, year, and vessel. Professional guidance is recommended; if any step is unclear, stop and seek professional installation.

Before cutting or drilling, have a qualified marine technician confirm compatibility, the correct flush line and connection point, and a safe hose route. Do not bypass check valves or modify a line based on photos alone.

Route a separate hose for each engine, maintain steering and tilt clearance, and test every connection using the engine manufacturer’s procedure. Do not assume the engine may run while connected to its flush port.

Silicone spray is recommended when feeding the hose through the rigging tube; confirm compatibility with the hose and rigging materials.

Tools and hardware may include a drill, suitable hole saw and drill bits, #8 stainless steel screws, hose cutter, and screwdriver. These are not included.

Read the complete installation guide and safety notices.

ONE INSTALLATION KIT PER ENGINE

HOW MANY KITS DO YOU NEED?

For a new Reroute installation, pair one plate with the number of kits shown below. Select the hose size that matches each engine’s approved connection and the plate’s barb size.

SINGLE ENGINE

1 Reroute Install Kit

Pair with (1) Single Outlet Flush Port Reroute, sold separately.

TWIN ENGINES

2 Reroute Install Kits

Pair with (1) Dual Outlet Flush Port Reroute, sold separately.

TRIPLE ENGINES

3 Reroute Install Kits

Pair with (1) Triple Outlet Flush Port Reroute, sold separately.

QUAD ENGINES

4 Reroute Install Kits

Pair with (1) Quad Outlet Flush Port Reroute, sold separately.

REAL INSTALLATION EXAMPLES

SEE WHERE THE KIT GOES

General examples from the installation guide. Engine layouts and connection methods vary. Have a qualified marine technician confirm the correct flush line and connection point before cutting or modifying anything.
View All Installation Steps

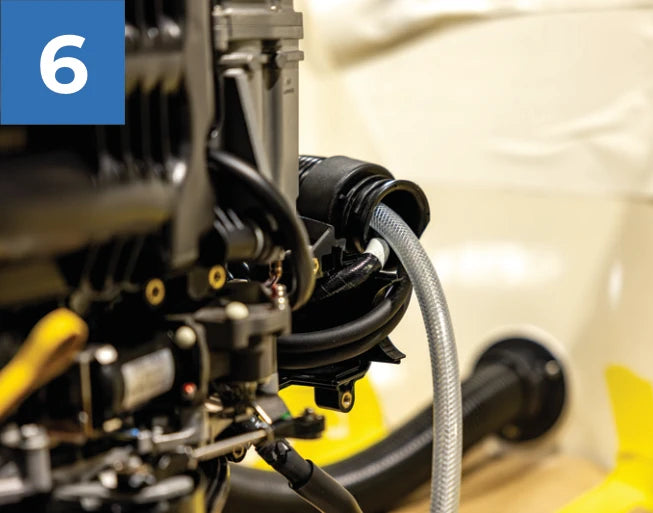
New reinforced hose fed through the rigging tube toward the engine.

FOLLOW THE HOSE ROUTE

Step 6 from the guide: the new hose passes through the rigging tube toward the engine. Confirm a safe route and leave enough slack for steering and tilt. Silicone spray is recommended; check material compatibility.

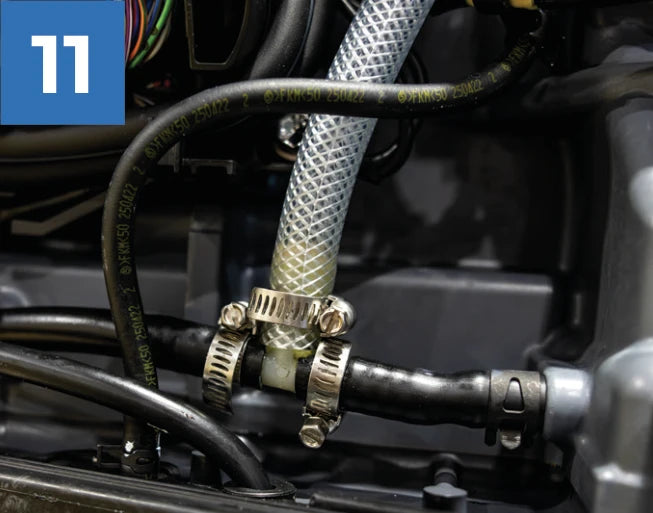
New reinforced hose connected to the tee and secured with a hose clamp.

CONFIRM THE ENGINE CONNECTION

Step 11 from the guide: an example tee connection at one engine. Have a qualified marine technician confirm the correct line and connection method before cutting. Your engine may require a different arrangement.

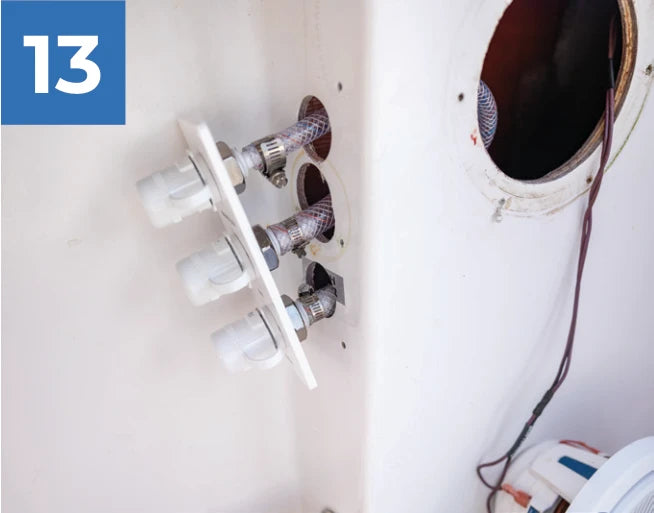
Hoses attached to the pre-installed barbs on the back of the reroute plate.

FINISH AT THE REROUTE PLATE

Installed dual-outlet plate shown for context. Each engine connects to its own outlet. Reroute plate, Quick Connect fittings, and mounting hardware shown are not included in this Reroute Install Kit.

FAQs

What extra part is required for Mercury V10 engines?

Mercury V10: required part 8M0192180. This Mercury male fitting connects to the engine cooling system. You cannot complete a Mercury V10 Reroute installation without it. It is not included with the Reroute plate or Reroute Install Kit. Source it separately through a Mercury parts supplier before installation.

How do I choose between 1/2″ and 3/8″?

Match the hose size to the Reroute barb and the engine’s approved flush-line connection. Have a marine technician confirm the size and connection method; engine brand alone is not enough.

Both sizes are available on this page. Choose 1/2″ or 3/8″ using the Hose Size selector before adding your Reroute Install Kit to the cart.

How many Reroute Install Kits do I need?

For a new Reroute installation: single engine = 1 kit, twin engines = 2 kits, triple engines = 3 kits, quad engines = 4 kits. Pair these with one Reroute plate with the matching outlet count. Measure each hose route before ordering.

Is this the same as the Hose Connection Kit?

No. The Reroute Install Kit provides plumbing hose, clamps, and a tee for the route between the engine and the Reroute plate.

The Hose Connection Kit adds Quick Connect fittings and a shutoff valve to a garden hose so you can swap between a spray nozzle and a Flushmaster Controller. View the Hose Connection Kit.

My boat is already rerouted. Do I need new Reroute Install Kits?

Possibly not. If you are replacing existing fittings or a Reroute plate, a qualified marine technician should inspect the existing hoses and confirm their size, condition, length, and compatibility. Reuse suitable plumbing only after that assessment.

Can I install it myself, and how do I flush afterward?

Some installations are straightforward; others require professional assistance. Read the full guide before starting. If any step, connection point, or manufacturer instruction is unclear, stop and use a qualified marine technician.

After installation and leak testing, follow the engine manufacturer’s flushing instructions every time, including engine position, water supply, flush duration, and whether the engine must remain off. A controller and its outlet hoses are separate from this Reroute Install Kit.

View the installation guide.